Magento 2 Command-line interface (CLI) tools differ from those in Magento 1. In Magento 1 you could simply add a script to the “shell” directory, include abstract.php, and extend from it. Magento 2 is a bit more complicated. This post will show you how to create a simple CLI script in Magento 2.
First, we need to declare a module (you can use an existing one, if you have it). We need to create: registration.php, composer.json (actual path: app/code/Atwix/Shell/composer.json), and etc/module.xml:
<?php
/**
 * @author Atwix Team
 * @copyright Copyright (c) 2017 Atwix (https://www.atwix.com/)
 * @package Atwix_Shell
 *
 * path: app/code/Atwix/Shell/registration.php
 */

\Magento\Framework\Component\ComponentRegistrar::register(
    \Magento\Framework\Component\ComponentRegistrar::MODULE,
    'Atwix_Shell',
    __DIR__
);
{
  "name": "atwix/shell",
  "description": "Shell script test",
  "require": {
    "php": "~5.6.0|~7.0.0"
  },
  "type": "magento2-module",
  "version": "1.1.7",
  "license": [
    "OSL-3.0",
    "AFL-3.0"
  ],
  "autoload": {
    "files": [ "registration.php" ],
    "psr-4": {
      "Atwix\\Shell\\": ""
    }
  }
}
<?xml version="1.0"?>
<!--
/**
 * @author Atwix Team
 * @copyright Copyright (c) 2017 Atwix (https://www.atwix.com/)
 * @package Atwix_Shell
 *
 * path: app/code/Atwix/Shell/etc/module.xml
 */
-->
<config xmlns:xsi="http://www.w3.org/2001/XMLSchema-instance" xsi:noNamespaceSchemaLocation="urn:magento:framework:Module/etc/module.xsd">
    <module name="Atwix_Shell" setup_version="1.0.0">
        <sequence>
        </sequence>
    </module>
</config>
Now, let’s create the script itself:
<?php
/**
 * @author Atwix Team
 * @copyright Copyright (c) 2017 Atwix (https://www.atwix.com/)
 * @package Atwix_Shell
 *
 * path: app/code/Atwix/Shell/Console/Command/TestCommand.php
 */

namespace Atwix\Shell\Console\Command;

use Symfony\Component\Console\Command\Command;
use Symfony\Component\Console\Input\InputInterface;
use Symfony\Component\Console\Output\OutputInterface;

/**
 * Class TestCommand
 */
class TestCommand extends Command
{
    /**
     * {@inheritdoc}
     */
    protected function configure()
    {
        $this->setName('atwix:test')->setDescription('Test console command');
    }

    /**
     * {@inheritdoc}
     */
    protected function execute(InputInterface $input, OutputInterface $output)
    {
        $output->writeln("Hello world!");
    }
}
Our class extends the \Symfony\Component\Console\Command\Command and contains two methods:
- configure – sets the command name and a short description;
- execute – contains the actual script logic.
Now we need to register our script. In order to do so, we need to pass the reference to our class to Magento\Framework\Console\CommandListInterface constructor as an item of “commands” array argument. We will use di.xml for that purpose:
<?xml version="1.0"?>
<!--
/**
 * @author Atwix Team
 * @copyright Copyright (c) 2017 Atwix (https://www.atwix.com/)
 * @package Atwix_Shell
 *
 * path: app/code/Atwix/Shell/etc/di.xml
 */
-->
<config xmlns:xsi="http://www.w3.org/2001/XMLSchema-instance" xsi:noNamespaceSchemaLocation="urn:magento:framework:ObjectManager/etc/config.xsd">
    <type name="Magento\Framework\Console\CommandListInterface">
        <arguments>
            <argument name="commands" xsi:type="array">
                <item name="atwix_test" xsi:type="object">Atwix\Shell\Console\Command\TestCommand</item>
            </argument>
        </arguments>
    </type>
</config>
We are ready. Now we need to install our extension:
cd path/to/your/magento2/installation
bin/magento setup:upgrade
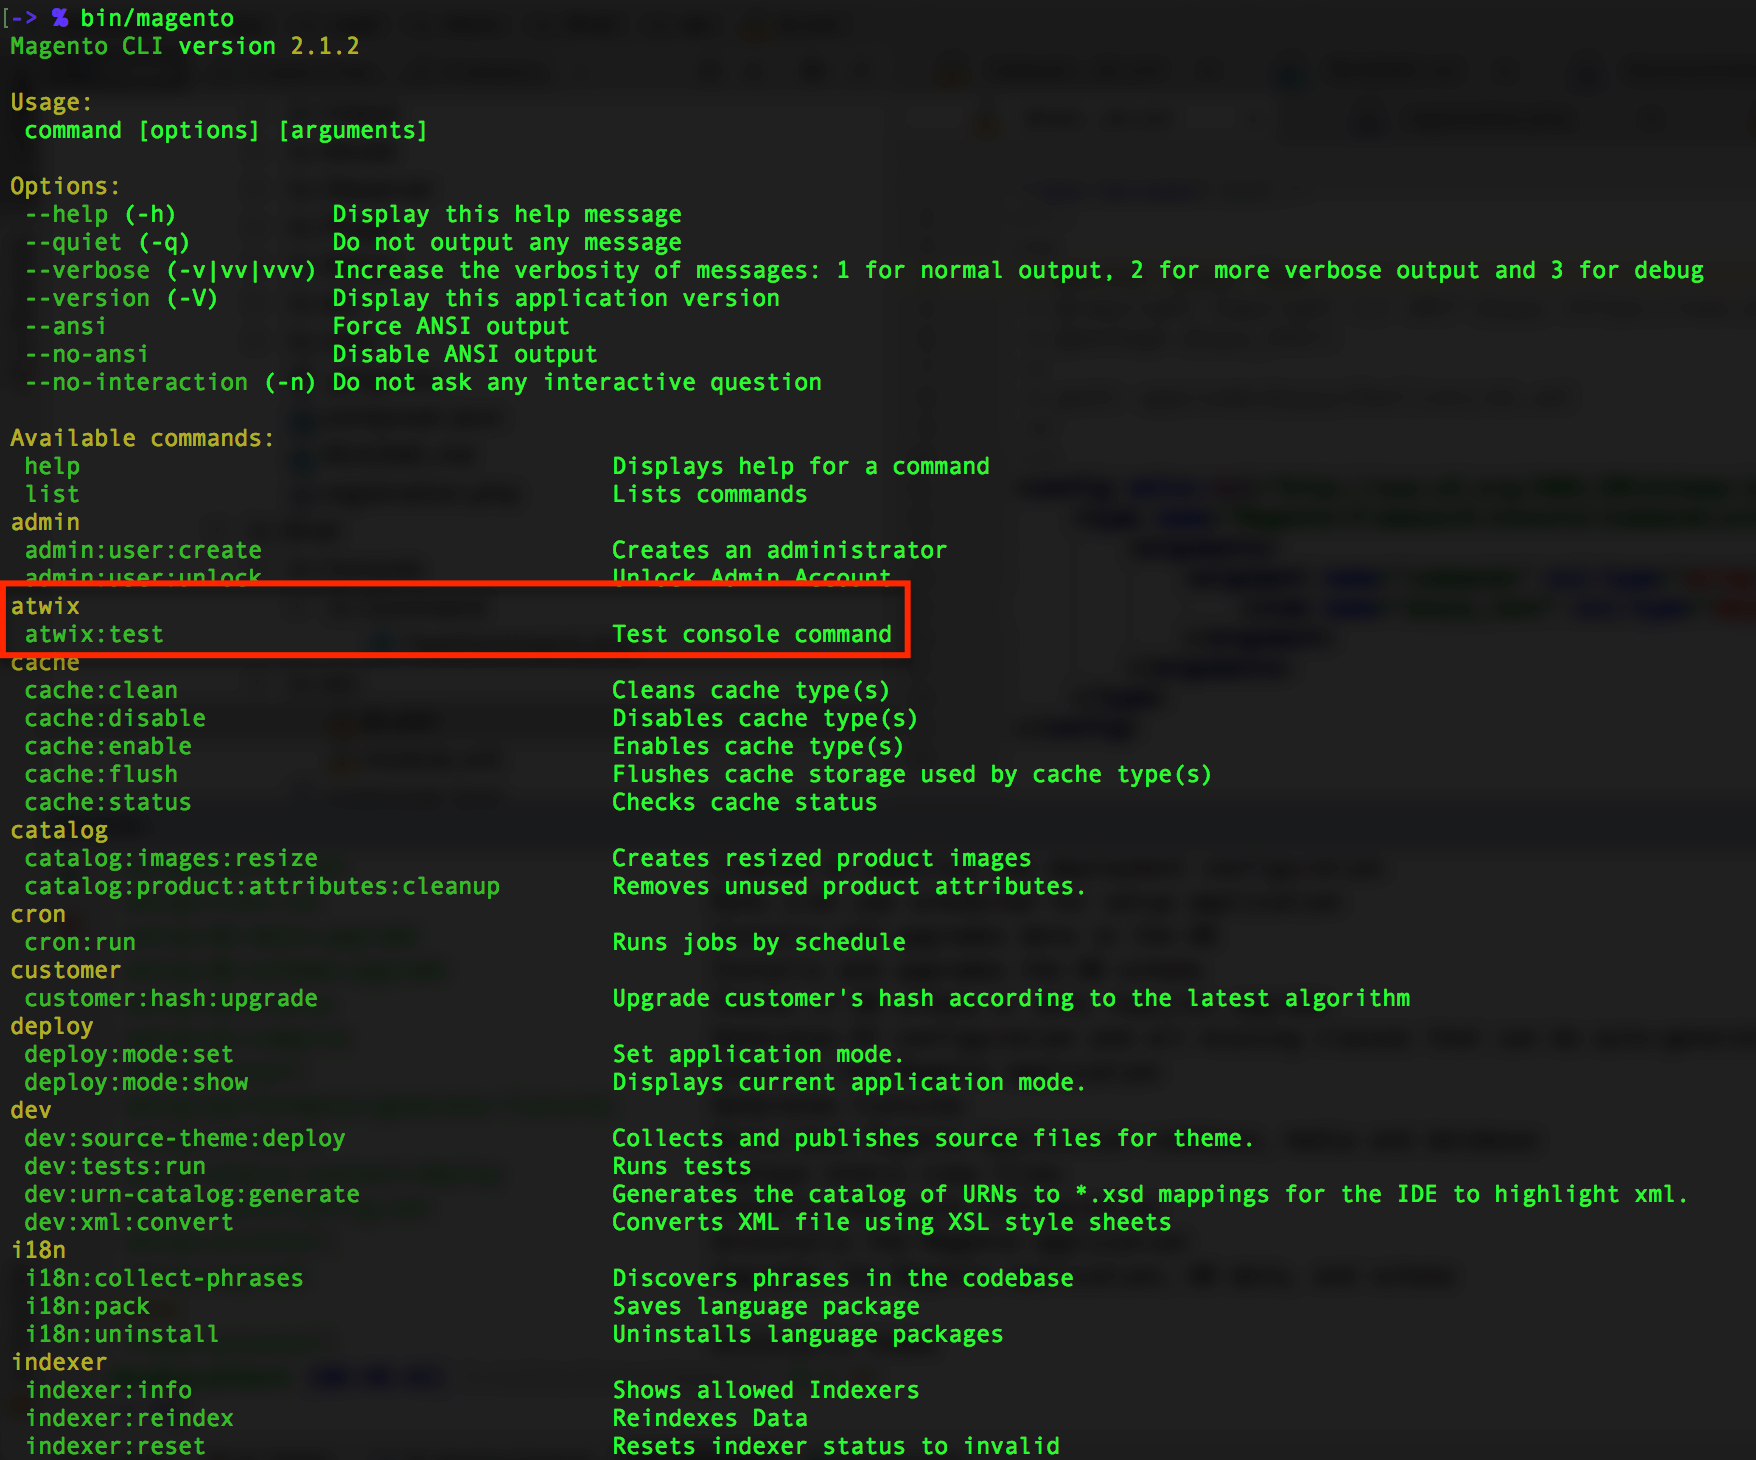
We will be able to see our test command in the list of available bin/magento options:

If we try to run it, we will get a desired result:
bin/magento atwix:test

So, in order to get our CLI script in Magento 2 we need to have a module, a class inherited from the \Symfony\Component\Console\Command\Command, and a declaration of our class in a di.xml.
That’s all! Thanks for reading and learning!
Read more:
