If you have ever created CMS pages and blocks in Magento, you should know that there is a useful editor that makes entering the formatted text much easier. In this article, we will attach this WYSIWYG (What You See Is What You Get) editor to our Magento admin form.
We start by creating a form itself, but if you are familiar with this routine process you can skip this step. First of all, add a new module skeleton. For now Config.xml looks like this:
<?xml version="1.0"?>
<!-- app/code/local/Atwix/Editor/etc/config.xml -->
<config>
    <modules>
        <Atwix_Editor>
            <version>0.1.0</version>
        </Atwix_Editor>
    </modules>
    <global>
        <blocks>
            <atwix_editor>
                <class>Atwix_Editor_Block</class>
            </atwix_editor>
        </blocks>
        <helpers>
            <atwix_editor>
                <class>Atwix_Editor_Helper</class>
            </atwix_editor>
        </helpers>
    </global>
</config>
Let’s add Adminhtml controller declaration to config.xml and new menu item to adminhtml.xml:
<!-- app/code/local/Atwix/Editor/etc/config.xml -->
<config>
    ...
    <admin>
        <routers>
            <adminhtml>
                <args>
                    <modules>
                        <Atwix_Editor before="Mage_Adminhtml">Atwix_Editor_Adminhtml</Atwix_Editor>
                    </modules>
                </args>
            </adminhtml>
        </routers>
    </admin>
    ...
</config>
New Admin menu item under CMS:
<!-- app/code/local/Atwix/Editor/etc/adminhtml.xml -->
<config>
    <menu>
        <cms>
            <children>
                <editor translate="title" module="atwix_editor">
                    <title>WYSIWYG editor form</title>
                    <action>adminhtml/editor</action>
                    <sort_order>100</sort_order>
                </editor>
            </children>
        </cms>
    </menu>
</config>
On the next step, create an empty controller class at app/code/local/Atwix/Editor/controllers/EditorController.php.
So, the router configuration is finished, and now it is time to create Form and Form Container blocks. Please note that to simplify our article we will not use a grid, models, etc.
Below is the form container class:
<?php
/* app/code/local/Atwix/Editor/Block/Adminhtml/Editor.php */

class Atwix_Editor_Block_Adminhtml_Editor extends Mage_Adminhtml_Block_Widget_Form_Container
{
    public function __construct()
    {
        parent::__construct();
        $this->_blockGroup      = 'atwix_editor';
        $this->_controller      = 'adminhtml';
        $this->_mode            = 'editor';
        $this->_updateButton('save', 'label', Mage::helper('atwix_editor')->__("Submit Form"));

        /*use the following code if you need saveAndContinueEdit button

        $this->_addButton('saveandcontinue', array(
            'label'     => Mage::helper('atwix_editor')->__('Save and Continue Edit'),
            'onclick'   => 'saveAndContinueEdit()',
            'class'     => 'save',
        ), -100);

        $this->_formScripts[] = "
            function saveAndContinueEdit(){
                editForm.submit($('edit_form').action+'back/edit/');
            }
        ";*/
    }

    public function getHeaderText()
    {
        return Mage::helper('atwix_editor')->__("WYSIWYG editor form");
    }

    /**
     * Get form save URL
     *
     * @deprecated
     * @see getFormActionUrl()
     * @return string
     */
    public function getSaveUrl()
    {
        $this->setData('form_action_url', 'save');
        return $this->getFormActionUrl();
    }
}
Furthermore, in the form block we will add two fields. The Description is the one that WYSIWYG editor will be attached to. Note that it has the editor field type and the wysiwyg param is set to true. Also, there is the config param that allows us to specify some editor options, these details can be found in Mage_Cms_Model_Wysiwyg_Config.
/* app/code/local/Atwix/Editor/Block/Adminhtml/Editor/Form.php */

class Atwix_Editor_Block_Adminhtml_Editor_Form extends Mage_Adminhtml_Block_Widget_Form
{

    protected function _prepareForm()
    {
        $form   = new Varien_Data_Form(array(
            'id'        => 'edit_form',
            'action'    => $this->getUrl('*/*/save'),
            'method'    => 'post'
        ));

        $fieldset   = $form->addFieldset('base_fieldset', array(
            'legend'    => Mage::helper('atwix_editor')->__("Some Information"),
            'class'     => 'fieldset-wide',
        ));

        $fieldset->addField('name', 'text', array(
            'name'      => 'name',
            'label'     => Mage::helper('atwix_editor')->__('Name'),
            'title'     => Mage::helper('atwix_editor')->__('Title'),
            'required'  => true,
        ));

        $wysiwygConfig = Mage::getSingleton('cms/wysiwyg_config');
        $fieldset->addField('description', 'editor', array(
            'name'      => 'description',
            'label'     => Mage::helper('atwix_editor')->__('Description'),
            'title'     => Mage::helper('atwix_editor')->__('Description'),
            'style'     => 'height: 600px;',
            'wysiwyg'   => true,
            'required'  => false,
            'config'    => $wysiwygConfig
        ));

        $form->setUseContainer(true);
        $this->setForm($form);

        return parent::_prepareForm();
    }
}
We can create our form directly in the controller action and add it to the content block. The index action will look the following way in this case:
/* app/code/local/Atwix/Editor/controllers/EditorController.php */

public function indexAction()
{
    $this->loadLayout();
    $this->_addContent($this->getLayout()->createBlock('atwix_editor/adminhtml_editor'));
    $this->renderLayout();
}
Nevertheless, instead of this let’s declare layout update in config.xml and create the form block using layouts:
<!-- app/code/local/Atwix/Editor/etc/config.xml -->
<config>
    ...
    <adminhtml>
        <layout>
            <updates>
                <atwix_editor>
                    <file>atwix_editor.xml</file>
                </atwix_editor>
            </updates>
        </layout>
    </adminhtml>
    ...
</config>
<!-- app/design/adminhtml/default/default/layout/atwix_editor.xml -->
<layout>
    <adminhtml_editor_index>
        <reference name="content">
            <block type="atwix_editor/adminhtml_editor" name="wysiwyg_editor_form"/>
        </reference>
    </adminhtml_editor_index>
</layout>
The controller action will look like here is:
/* app/code/local/Atwix/Editor/controllers/EditorController.php */
public function indexAction()
{
    $this->loadLayout();
    $this->renderLayout();
}
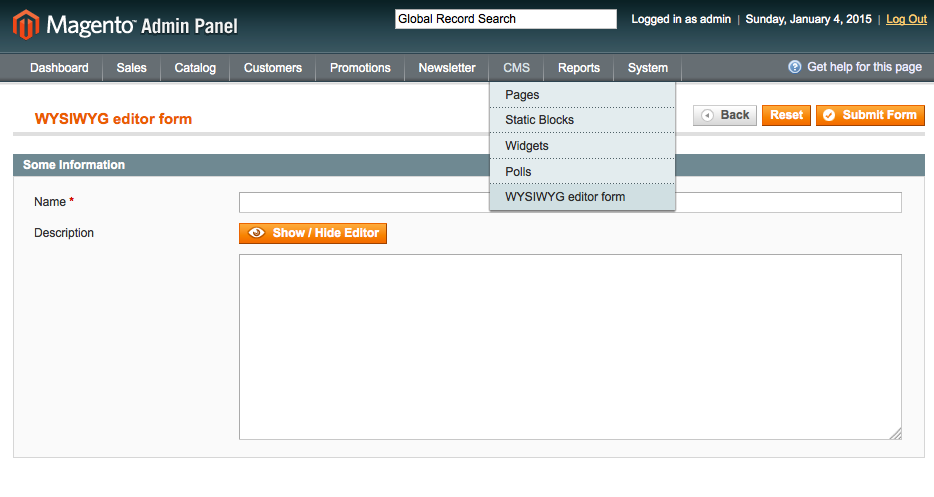
At this point, you should be able to see the form under CMS -> WYSIWYG editor form.
And of course, we see that the WYSIWYG editor doesn’t work. The issue reason is that the JavaScript file required for the editor is being missed. So, we need to set a can_load_tiny_mce flag of the head block to true to include it. This can be done in the _prepareLayout() function of our form class:
/* app/code/local/Atwix/Editor/Block/Adminhtml/Editor/Form.php */

/**
 * Load Wysiwyg on demand and Prepare layout
 */
protected function _prepareLayout()
{
    parent::_prepareLayout();
    if (Mage::getSingleton('cms/wysiwyg_config')->isEnabled()) {
        $this->getLayout()->getBlock('head')->setCanLoadTinyMce(true);
    }
}
Finally, on this stage the editor should be ready for use. Let’s add the save controller action and try to submit the form.
/* app/code/local/Atwix/Editor/controllers/EditorController.php */

public function saveAction()
{
    $name = '<h1>' . $this->getRequest()->getParam('name') . '</h1>';
    $description = $this->getRequest()->getParam('description');
    $content = $name . $description;
    $block = $this->getLayout()->createBlock('core/text')->setText($content);
    $this->loadLayout();
    $this->_addContent($block);
    $this->renderLayout();
}
And here is the submitted form sample:
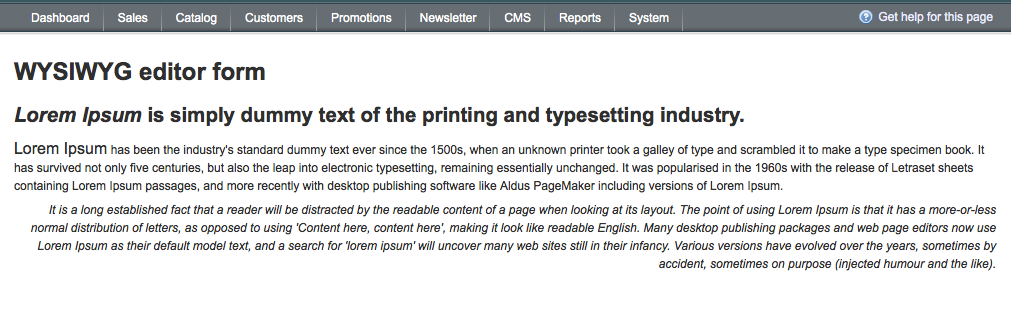
That’s it – the source code can be found at Github.
Thank you for reading our blog and we will be grateful to receive your feedback in the comments below.
You may also want to read: