Hello guys, it’s time to tell you how to insert block into any place you want in Magento. As you know, very often we need to set some block into selected weird place without editing template, so we’ll try to describe the way how to do this using layouts and observers.In our case, for such experiments will be used category page.
Let’s say, you need to place your block inside the other one and this block is instance of the Mage_Core_Block_Text_List class. That means, the block renders his children automatically, what’s easy. Then, you just need to follow the steps which are below:
<reference name="left">
    <block type="core/template" name="test" template="at.phtml"></block>
</reference>
This block will be displayed after all content of the “left“ block. But, what if we need it to be displayed before all content – just add the “before” directive. See below such example:
<reference name="left">
    <block type="core/template" name="test" template="at.phtml" before="-"></block>
</reference>
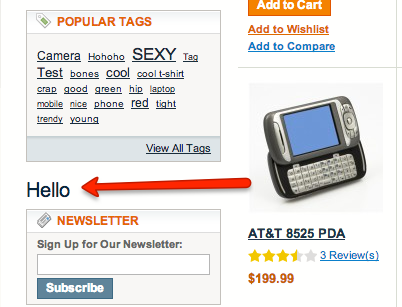
In case, you need to place your block between first level children of the “left” one, you should add before=”name” or after=”name”, and check following code:
<reference name="left">
    <block type="core/template" name="test" template="at.phtml" after="tags_popular"></block>
</reference>
That was pretty easy, but when we deal with none first level blocks – supposing, it is necessary to insert the block after price on the category page, and for such implementation you should use the observer core_block_abstract_to_html_before. Besides that, don’t forget to declare model in your config.xml:
<?xml version="1.0"?>
<config>
    <global>
    <!-- ... -->
        <models>
            <atwix_test>
                <class>Atwix_Test_Model</class>
            </atwix_test>
        </models>
    </global>
    <frontend>
        <events>
            <core_block_abstract_to_html_before>
                <observers>
                    <atwix_test>
                        <type>model</type>
                        <class>atwix_test/observer</class>
                        <method>insertBlock</method>
                    </atwix_test>
                </observers>
            </core_block_abstract_to_html_before>
        </events>
    </frontend>
</config>
The next step is creating the observer and your template file.
You can place the template to app/design/frontend/<package>/<theme>/at.phtml for example. For this, look at the observer’s code below:
<?php

class Atwix_Test_Model_Observer
{
    public function insertBlock($observer)
    {
        /** @var $_block Mage_Core_Block_Abstract */
        /*Get block instance*/
        $_block = $observer->getBlock();
        /*get Block type*/
        $_type = $_block->getType();
       /*Check block type*/
        if ($_type == 'catalog/product_price') {
            /*Clone block instance*/
            $_child = clone $_block;
            /*set another type for block*/
            $_child->setType('test/block');
            /*set child for block*/
            $_block->setChild('child', $_child);
            /*set our template*/
            $_block->setTemplate('at.phtml');
        }
    }
}
And finally, here is a template at.phtml code:
<?php echo $this->getChildHtml('child') ?>
<h1>Hello</h1>
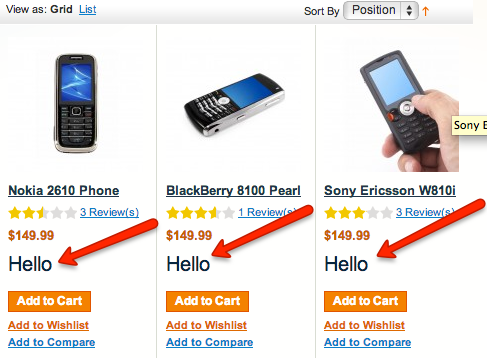
The result is:
That’s all folks! However, if you know another good way how to insert the blocks, please share your knowledges with us.
You may also want to read:


