Very often the web store is visited by customers from different countries, so, it is really good practice to use multi language feature on the website. As you know, the universal language is English, but what about the customers who are more comfortable with the websites which are using their native language. Therefore, internationalization of your web store can attract new customers, and Magento can help with this because we can use an unlimited number of languages on the website.
Note, that English, French and German languages go out of the box in Magento. But you may also need to download and install some another language pack. How to proceed with this is described below.
Install language packs via Magento Connect
First of all, go to magentocommerce.com/magento-connect/customer-experience/internationalization-localization.html and find a language pack. There you can select the desired language, and go to the page for install. Then, click on Install Now button to get the key, and copy this key.
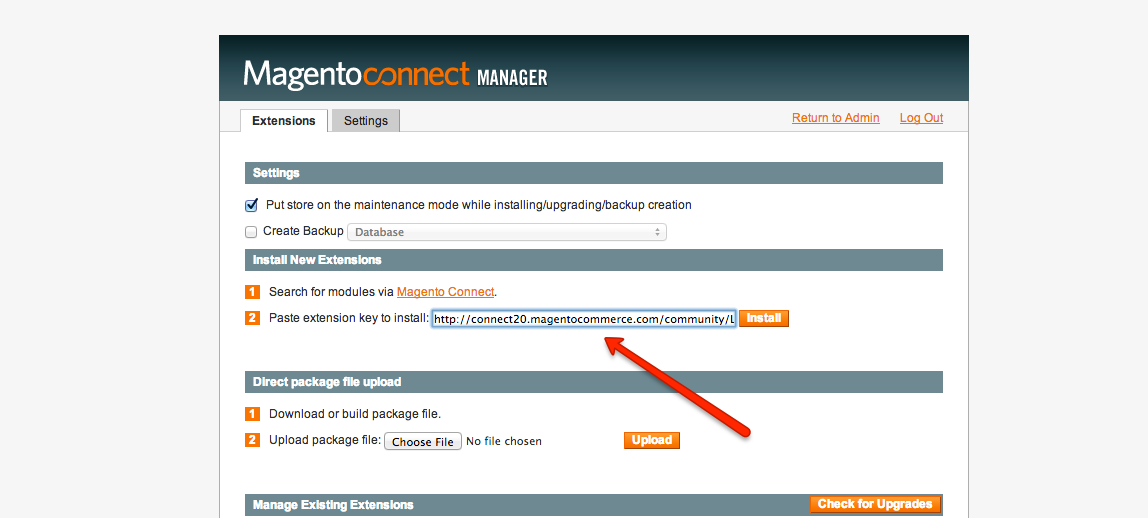
Next step is to login to Magento admin panel, select System -> Magento Connect -> Magento Connect Manager and insert the key details to the field “Paste extension key to install”:
You can install it as a simple as other extensions for Magento. After language pack installation, you should create a directory for the current language. For example, path to English language pack: app > locale > en_US. This directory consists of *.csv files for localization Magento core and some modules.
If you have a language pack, you can just copy the directory with language into app > locale and do not use Magento Connect. Moreover, if you have the necessary language packs, you can configure your store.
Magento configuration
Let’s add, for example, Italian language to the web store.
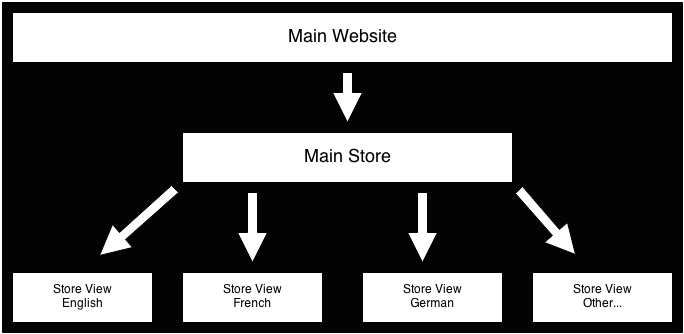
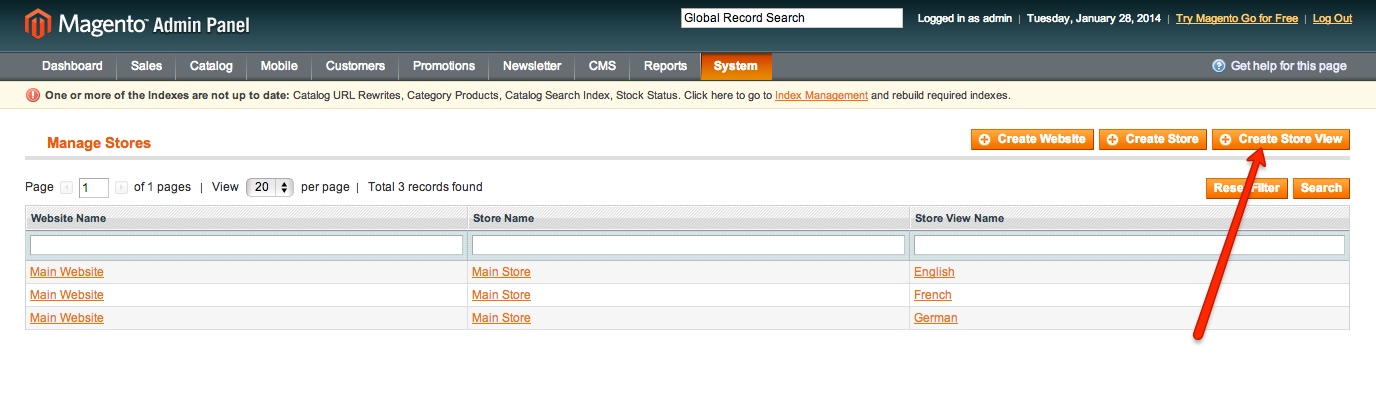
At the beginning, you need to create a Store View. The Store View can be created via Magento admin panel. That is, login to the admin panel, select System -> Manage Stores and click on Create Store View.
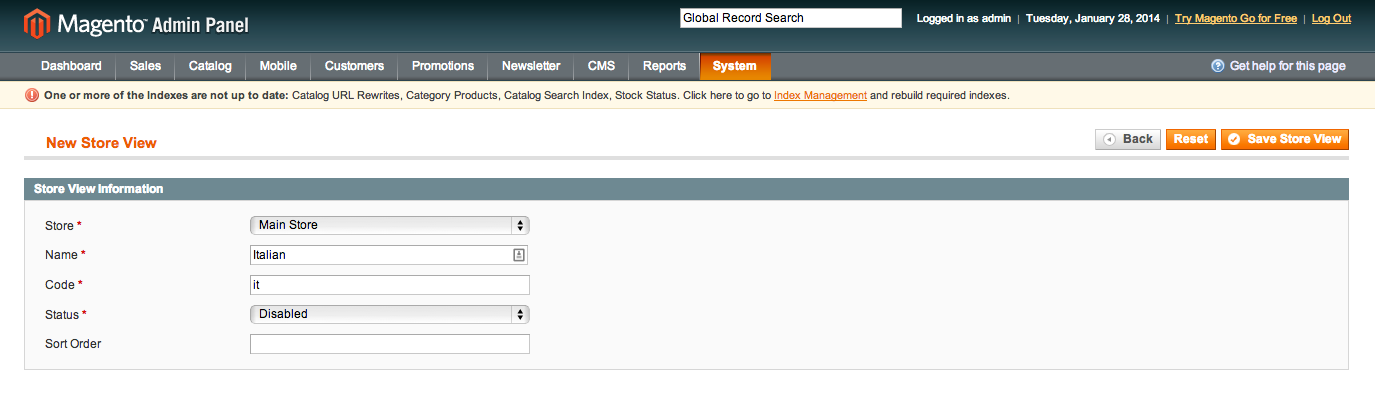
Next, fill in the form: select Store, enter your language Name, enter Code for language (in our case, for Italian code, it is “It”), Status is Enable, Sort order (is not required) and then, click on Save Store View button.
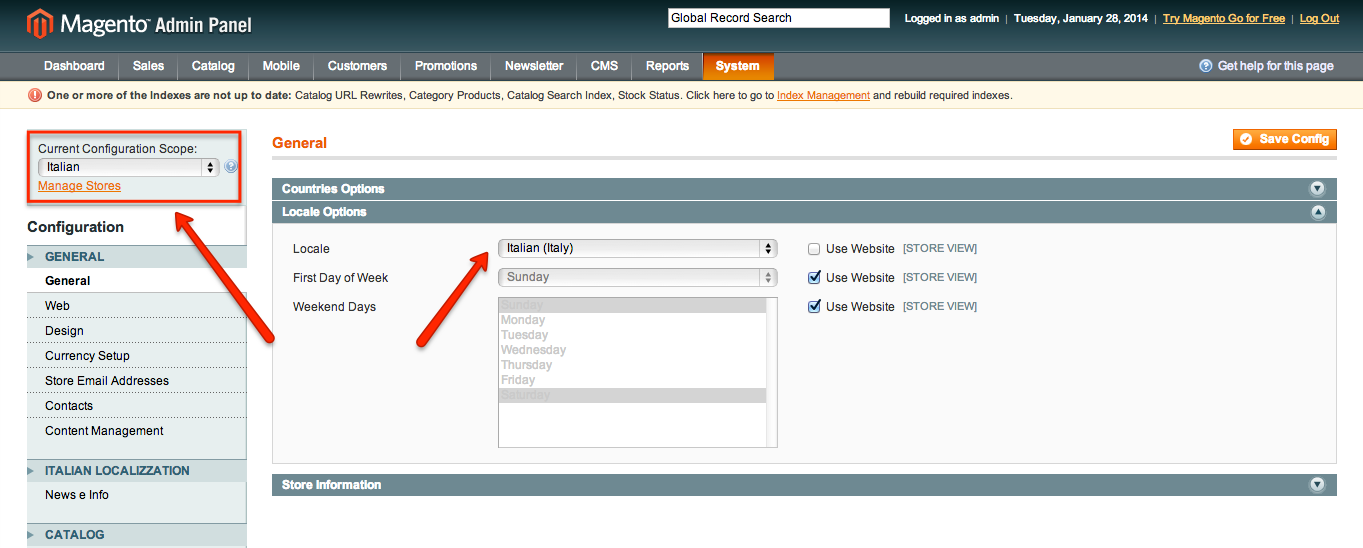
As a result, the Store View has been added, but you also need to configure it because for every Store View default language is English. So, go to System -> Configuration, choose the needed Store View and find the Locale options.
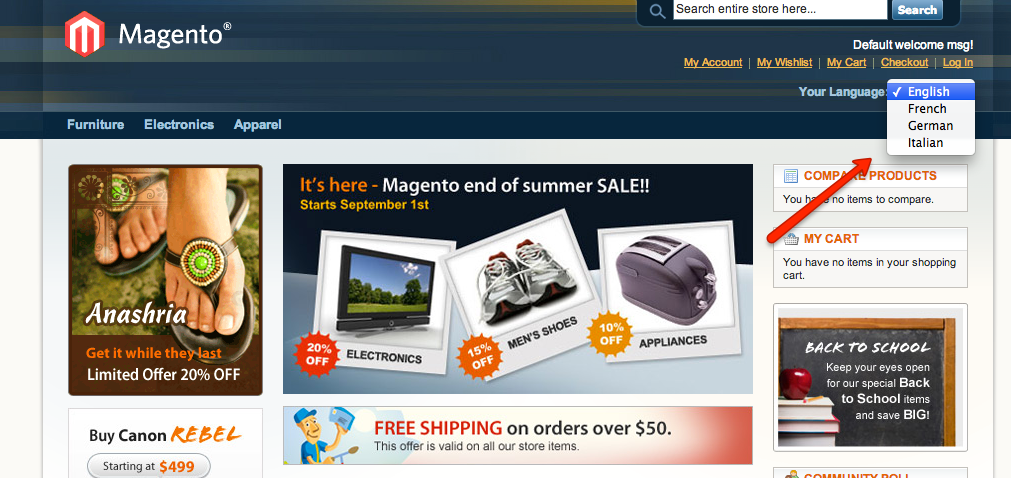
Furthermore, save config and clear the cache. Then, go to the home page of your web store. Upon the default Magento theme development the language switcher has been placed placed at the right side in the top.
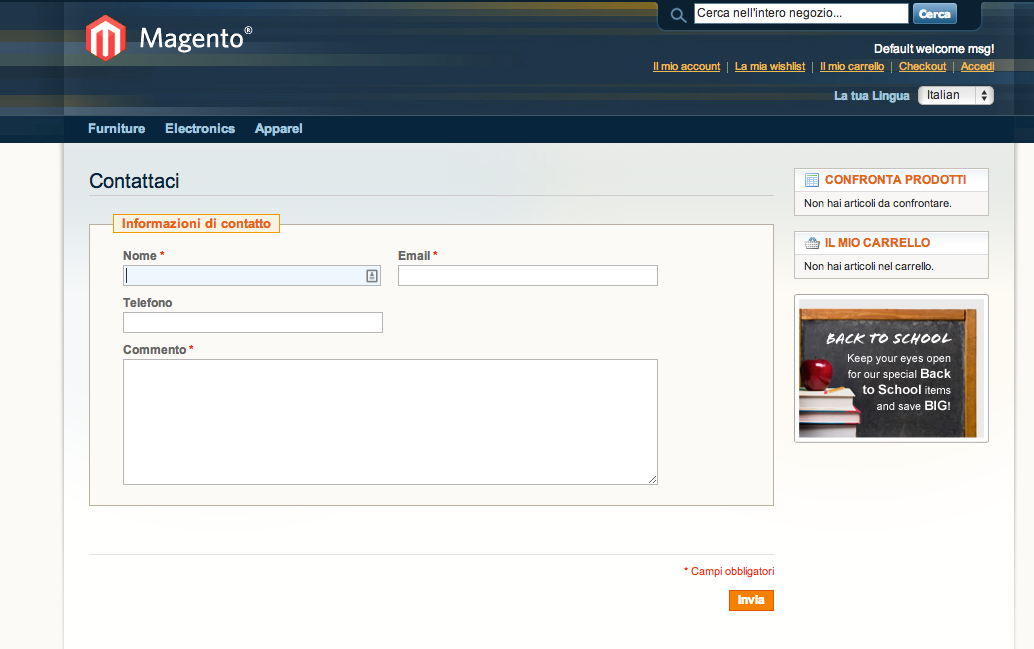
After choosing the needed language, you will see how your web store is changing languages. For example, if we change to the Italian language on the Contact Us page the result will be the following:
Remark
Choosing languages is not a simple translation of the full text on the pages. What text will change – is specified in *.csv files of your language pack. Actually, the custom modules and extensions will be not translated, so, it should be provided by developers. Also, pay attention to the themes, CMS static blocks and pages (Admin panel > CMS >…) which you need to configure separately.
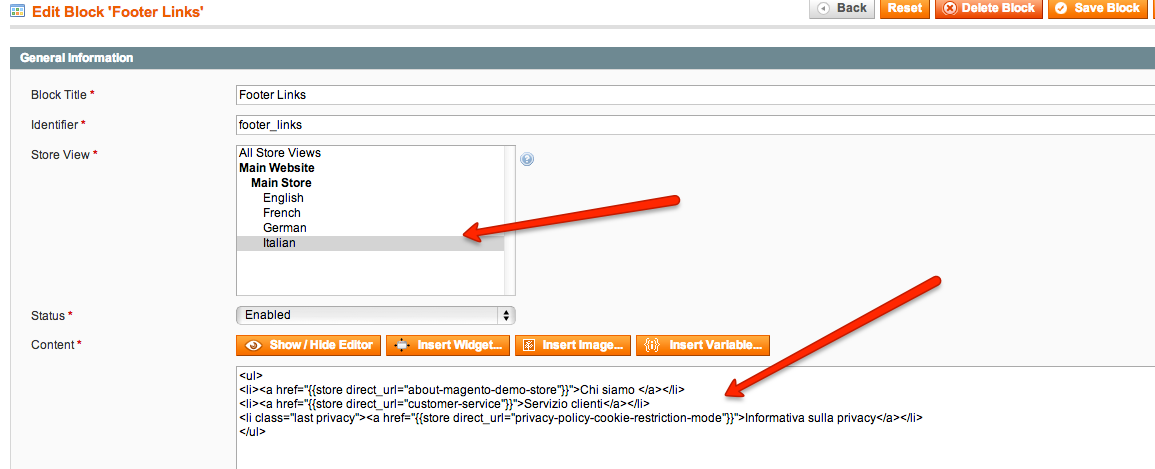
For example, for setting the static block “Footer Links” in Italian language – go to the admin panel > CMS > Static Blocks and click on Add New Block button. Then, copy all values from the Footer Links block, but you should change the Store View and content for the current story view.
For each language such settings must be done separately.
We hope our article will help you to work with language preferences on the web stores. All new ideas and feedbacks are warmly welcomed in the comments below.